
Home > Using our Epoxies- Application Guide
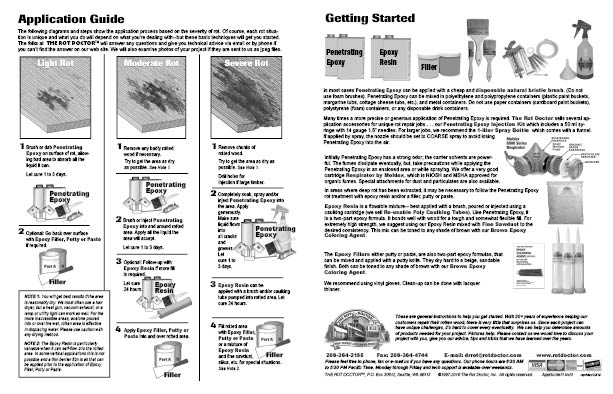
Epoxy Application Guide: Getting Started
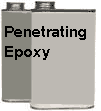

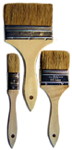

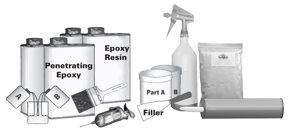
In most cases S-1™ Clear Penetrating Epoxy Sealer can be applied with a cheap and disposable natural bristle brush. (Do not use foam brushes). S-1™ Clear Penetrating Epoxy Sealer can be mixed in polyethylene and polypropylene containers (plastic paint buckets, margarine tubs, cottage cheese tubs, etc.), and metal containers. Do not use paper containers (cardboard paint buckets), polystyrene (foam) containers, or any disposable drink containers.
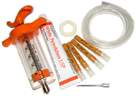
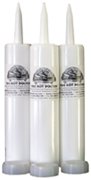
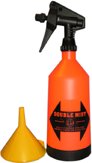
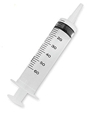
Many times a more precise or generous application of the S-1™ Penetrating Epoxy is required. The Rot Doctor sells several application accessories for unique rot repair jobs… our Penetrating Epoxy Injection Kit which includes a 50 ml syringe with 14 gauge 1.5″ needles. For overhead applications, we recommend the 1-liter Spray Bottle which comes with a funnel. If applied by spray, the nozzle should be set to COARSE spray to avoid losing the penetrating epoxy into the air. For large areas, we recommend solvent-resistant rollers available at home and hardware stores.
Initially the S-1™ Penetrating Epoxy has a strong odor; the carrier solvents are powerful. The fumes dissipate eventually, but, take precautions while applying the penetrating epoxies in an enclosed area or while spraying. We offer a very good cartridge Respirator by Moldex, which is NIOSH and MSHA approved for organic fumes. Special attachments for dust and particulates are also available.
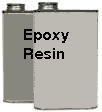
In areas where deep rot has been extracted, it may be necessary to follow the S-1™ Penetrating Epoxy rot treatment with epoxy resin and/or a filler, putty or paste. All of our products are molecularly compatible with each other for excellent bonding.
General Purpose Epoxy™ Resin is a flowable mixture — best applied with a brush, poured or injected using a caulking cartridge (we sell Re-usable Poly Caulking Tubes (10 oz size)) or our disposable epoxy syringe. Like the S-1™ Penetrating Epoxy it is a two-part epoxy formula. It bonds well with wood for a tough and somewhat flexible fill. For extremely high strength, we suggest using the General Purpose Epoxy™ Resin mixed with Fine Sawdust to the desired consistency. This mix can be toned to any shade of brown with our Brown Epoxy Coloring Agent.
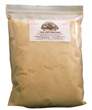
The Sculpwood® epoxy fillers, the Putty or Paste, are also two-part epoxy formulas that can be mixed and applied with a putty knife. They dry hard to a beige, sandable finish. Both can be toned to any shade of brown with our Brown Epoxy Coloring Agent.
We recommend using vinyl gloves. Clean-up can be done with with lacquer thinner.
These are general instructions to help you get started. With 20+ years of experience helping our customers repair their rotten wood, there is very little that surprises us. Since each project can have unique challenges, it’s hard to cover every eventuality. We can help you determine amounts of products needed for your project. Pictures help. Please contact us we would love to discuss your project with you, give you advice, tips and tricks that we have learned over the years.
Basic Procedures for
how to treat
Light, Moderate
and Severe Wood Rot
The following diagrams and steps show the application process based on the severity of rot. Of course, each rot situation is unique and what you do will depend on what you’re dealing with—but, these basic techniques will get you started. The folks at The Rot Doctor™ will answer any questions and give you technical advice via e-mail or by phone if you can’t find the answer on our web site. We will also examine photos if they are sent to us as jpeg files.
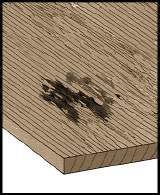
How to treat Light Wood Rot
1. Brush or dab S-1™ Penetrating Epoxy on surface of rotted area allowing area to absorb all the liquid it can.
LET CURE 1 TO 3 DAYS.
2. Optional: Go back over surface with Sculpwood® epoxy filler, the Putty or Paste if required.

How to treat Moderate Wood Rot
1. Remove any badly rotted wood if necessary.
Try to get the area as dry as possible. See Note 1.
2. Brush or inject S-1™ Penetrating Epoxy into and around rotted area. Apply all the liquid the area will accept. See Note 2.
LET CURE 1 TO 3 DAYS.
If wood is not as hard as desired, apply another coating of S-1™ Penetrating Epoxy. Again allow to cure 1 to 2 days.
3. Optional: Follow up with General Purpose Epoxy™ Resin if area has groove/gouges where rot has been removed. Apply as many coats/layers as needed but LET CURE 24 HOURS BETWEEN COATS.
4. Optional: Apply Sculpwood® epoxy filler, the Putty or Paste or a mix of General Purpose Epoxy™ Resin and Fine Sawdust for a smooth finish. Paint or apply desired covering after filler has set.
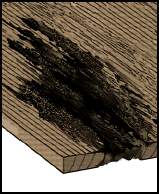
How to treat Severe Wood Rot
1. Remove loose chunks of rotted wood.
Try to get the area as dry as possible. See Note 1.
Drill downward sloping holes for injection if large timber.
2. Completely soak (pour or use kitchen baster), spray and/or inject S-1™ Penetrating Epoxy with syringe into the rotted area. Apply generously. See Note 2.
Make sure liquid flows into all cracks, grooves, and holes.
LET CURE 1 TO 3 DAYS.
3. Flow General Purpose Epoxy™ Resin to cavities where rot has been removed. See Note 3. If cavities are especially deep, sawdust can be added to the General Purpose Epoxy™ Resin to give it more body. This will not diminish the hardness. Apply as many coats/layers as needed but LET CURE 24 HOURS BETWEEN COATS.
4. AND/OR... Apply Sculpwood® epoxy filler, the Putty or Paste over surface area for smooth finish. Paint or apply desired covering after filler has set.
Note 1: You will get best results if the area is reasonably dry. Use a hair dryer, heat gun, space heater, vacuum exhaust, or even a lamp or utility light. For inaccessible areas, acetone poured into or over the wet, rotten area will help in displacing water. Use caution with all heating methods especially around volatile solvents.
Note 2: S-1™ Penetrating Epoxy has very strong odors from the carrier solvents. Take caution in breathing the fumes. In small amounts indoors, good ventilation and an exhaust fan will suffice. If you are using the S-1™ Penetrating Epoxy in an enclosed area or in large amounts, we recommend the use of a cartridge type respirator used for organic fumes. (We sell a very good one by Moldex).
Note 3: General Purpose Epoxy™ Resin is particularly valuable when it can self-flow into the rotted area. In some vertical applications this is not possible and a thin barrier film is all that can be applied prior to the application of the Sculpwood® epoxy filler, the Putty or Paste.
For your convenience, we condensed the Application Guide and Getting Started into one two page 8 ½ x 11″ pdf which is downloadable for printing.
Click on the image to download. If you don’t have Adobe’s Acrobat Reader program, it is available for free on Adobe’s website