Subject: Help with cedar log home.
Date: Tuesday, 13 Oct 2020
Hi doc!
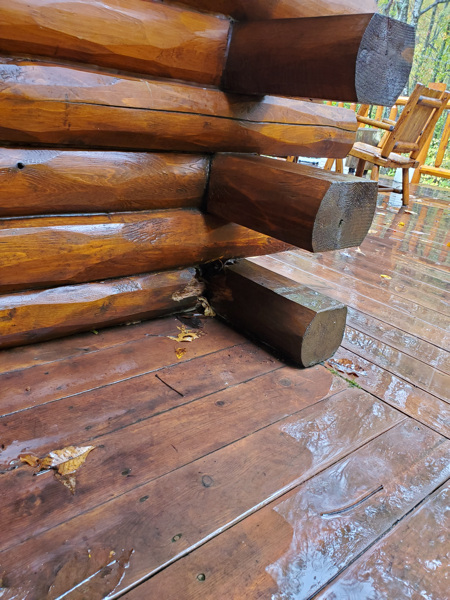
Can you recommend how to fill this hole in the corner of my house? You can see how the rain doesn’t drain well in this corner.
Thanks
William,
We certainly can. As with most things, the devil is in the details. I’ll explain.
First, the wood looks quite wet. If I were going to repair this, the first thing I would do is set up some plastic sheeting so that new moisture didn’t get to the logs. Then I would work on drying out the wood. A hair dryer or heat gun can be used to dry the surface. If the wood is as wet as it seems, then the surface should re-wet quickly. So you would repeat, until the surface remained dry. This would allow you to fix the damage.
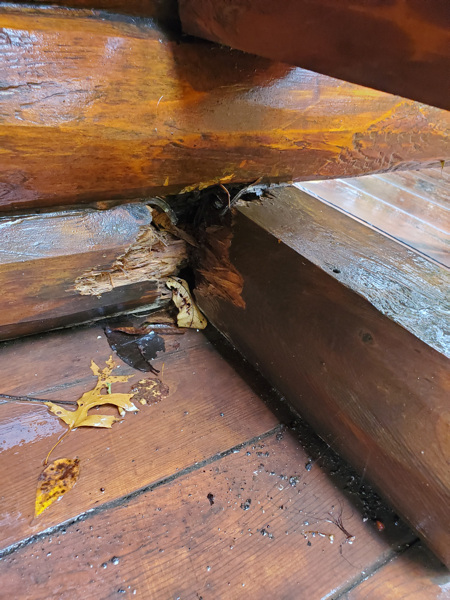
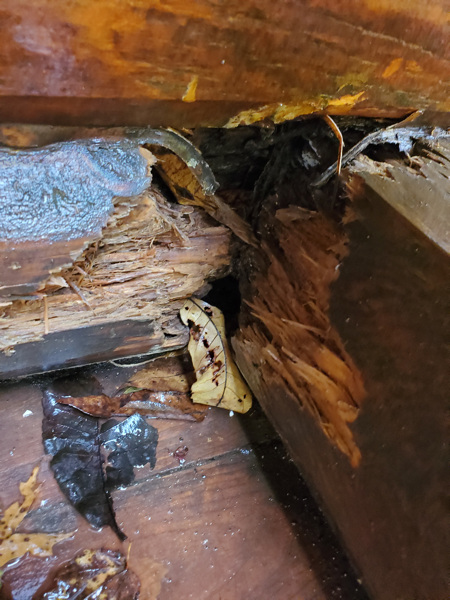
It appears to be white rot. But even if not, the repair is the same. Remove any rotted material that easily comes away. Soak the remainder with as much S-1 Sealer as the wood wants to take readily. If it stops, or slows down significantly, stop applying, and give the wood about a week to cure. This will stabilize and strengthen the wood. It can be hard to tell how much the wood will absorb, especially from images. My guess would be around one gallon. The S-1 is an excellent product to be applied anywhere moisture might easily get into the wood, like end grain. So it might be a good idea to buy more that you think you need for this job, and use the extra to seal the ends of the logs that are getting significant moisture. Typically, lower logs, and logs that face the driving rain. In our area, the southwest. After the S-1, comes filling in the missing material.
We have three filling products. All are strong, the main difference is the thickness. The General Purpose (GP) Epoxy Resin is about the consistency of honey. We do sell a lot of this product to log home owners, because log rot is often below the surface, and this being pourable, can be used to fill internal cavities. In your case, a brush coat over the damaged area would be good, but you wouldn’t need too much. Maybe two quarts.
The next thickest product is the Sculpwood Epoxy Paste. It is thick enough to apply in layers of about 1/4 to 1/2 inch without sagging, but thin enough to push into the smallest crack. Using a putty knife, or even your gloved hand, I would use this to fill cracks, and build up a smooth surface. You could certainly fill the entire cavity with this, but you would have to do it in layers of about 1/4 inch at a time.
It would be easier and quicker to do the majority of the fill with the Sculpwood Epoxy Putty. This is a thick putty, mixed with your gloved hands, and packed in to the cavity. It can be done straight, but I prefer to do a wetting coat of either the GP Resin, or the Sculpwood Paste. The Putty is slightly dry to get the strongest bond on its own. My best guess for quantities is some combination of 2 gallons of the Sculpwood Paste and Sculpwood Putty.
Structurally, this should be a strong, permanent repair. I don’t think that it is strictly necessary, but I might consider putting some pieces of polyethylene plastic in the approximate places where the two logs originally touched, to be left in place. This will introduce weak spots where cracks can form, if the two logs swell and shrink from moisture. Much like putting weak spots in concrete, it would be better to have a weak spot between the two logs, just in case.
That just leaves cosmetics. The two Sculpwood products are beige in color when cured. We do sell a brown resin dye that could be used to tint the beige color darker. Or you could use dry pigments from an art supply store to get the filler to any color you like. Just make sure that it is dry pigment, not any liquid.
Doc