
Home > Customer Projects > Wooden Bear Carving Repair

Subject: Wooden Bear Carving Repair
Date: Aug 2019 – May 2020
Note: All images can be seen in a larger version by clicking on them.
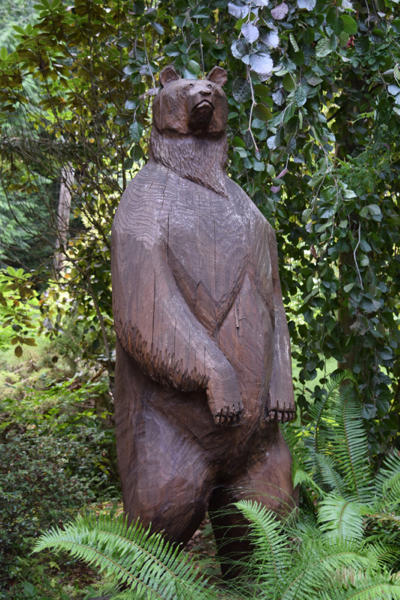
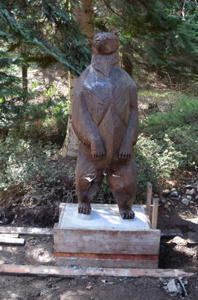
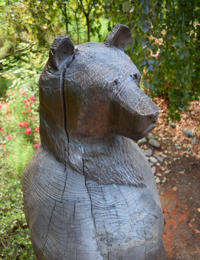
It doesn’t happen often, but once in a blue moon, we get the opportunity to help our customers with their projects in a more hands-on way. And this is such a project. It is a six foot-plus tall wooden bear, carved with a chainsaw, out of a dead tree, stump still in the ground.
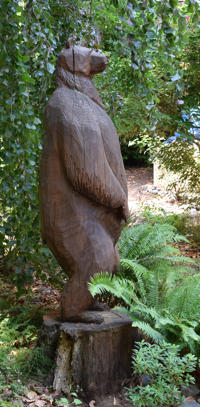
Unfortunately, the stump still being in the ground allowed moisture, and especially carpenter ants, to damage the bear carving. The pictures they showed us indicated that it was likely an extensive repair. Since the bear was within easy driving distance, we agreed to go see the sculpture in person, and assess the extent of the damage.
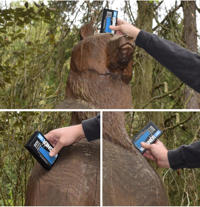
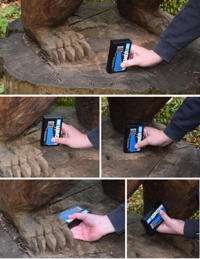
With a RF moisture meter and a visual inspection, it was apparent that the damage was fairly extensive. And while it would be possible to repair the damage in place, it would certainly be easier to do with the bear down off the stump. Removing the bear from the stump also allowed for the stump to be removed, and replaced with something more permanent. Because of the extensive nature of the damage, we decided that this was not a job for someone with no experience in using our products to try and tackle. So we agreed to do the repair for the customer. While that is fine in theory, this left actually doing the job.
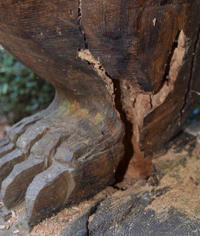
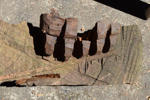
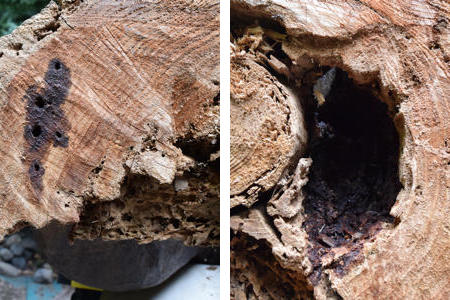
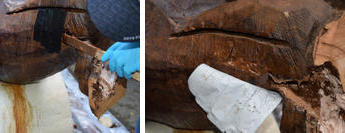
Ants had clearly done significant damage to the left leg of the bear. Further inspection showed that they were living throughout the body of the bear as well.
In addition to the ant problem, there was also the issue of moisture. In our preliminary examination, the stump, feet, and center of the head showed high moisture content, when surveyed with a professional grade Wagner moisture meter.
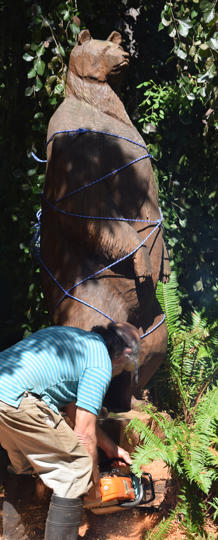
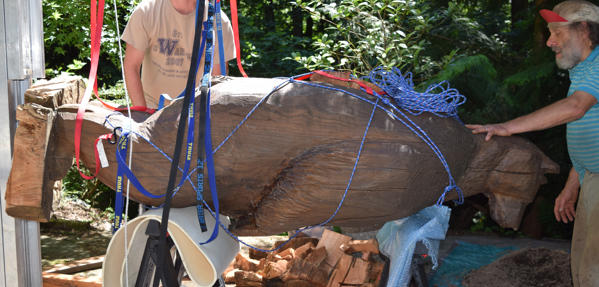
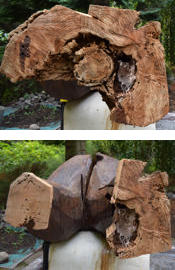
The most difficult part of the job was getting the bear down off the stump, and then back, once a suitable base had been procured. A six foot wooden bear is not light. Our estimate is 300–400 pounds. After much discussion, and a prohibitively expensive quote from a professional company, we decided to tackle this job ourselves, even though none of us had any experience in doing something like this.
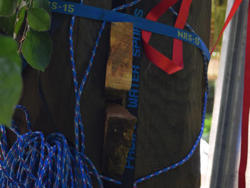
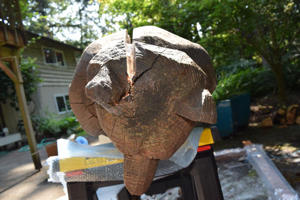
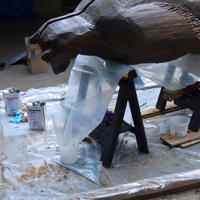
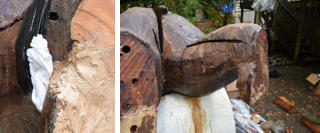
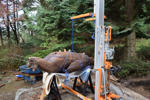
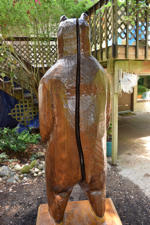
The owners rented a portable lift, and after rigging a harness, and cutting the base with a chainsaw, the bear was put onto sawhorses. Note: with a significant crack down her backside, we added wedges to keep any pressure around her torso from splitting her apart during the move off of the stump.
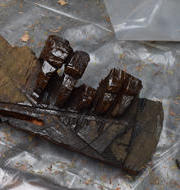
Although it all went as planned, except the bear’s toes broke off one foot, we weren’t too concerned. We knew that the epoxies we would be using would easily re-attach the toes. Everyone was much relieved to have her resting on the sawhorses.
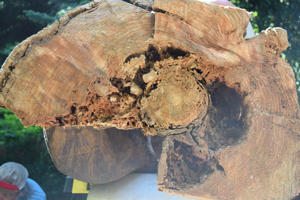
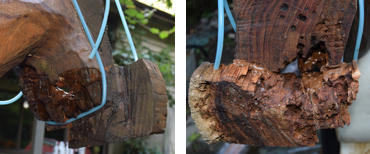
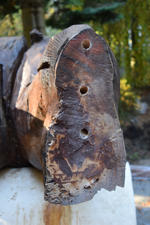
The carpenter ants had severely hollowed one leg, and were living throughout the torso. The other leg showed some signs of ant damage, but was not nearly as damaged. And, while it wasn’t evident from the surface, the ants had made nesting cavities up through the torso, all the way to the head.
While the moisture didn’t seem to be causing much damage, it did however hinder the repair, as moist wood doesn’t absorb epoxies, even good quality penetrating epoxies like the S-1 Sealer, nearly as well as dry wood.
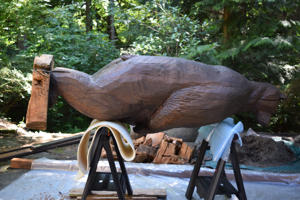
Once we had the bear on the “operating table”, repairs could commence. While the preferred strategy is to remove 95 percent of the damaged material, then start applying the epoxy products. In this case, that was not desirable, as we wanted to preserve as much of the original structure as possible, while disturbing the outer appearance as little as we could get away with. So we decided to use an approach that is common with log home repair, the drill and fill method. While this method can be just as effective as any other, it does usually take longer, and more care should be taken that a thorough repair is done.
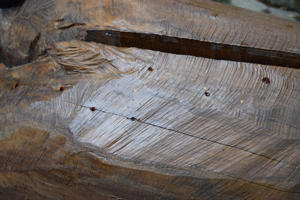
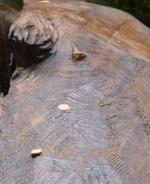
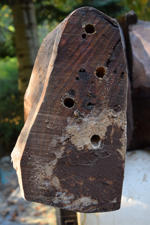
Starting at the more damaged leg, holes were drilled approximately every 4–6 inches (10–15 cm), as far as the damage was encountered. Which, in this case, was the head. Holes were also drilled in the opposite side, but no significant damage was found. The holes were limited to the back, to limit the cosmetic damage.
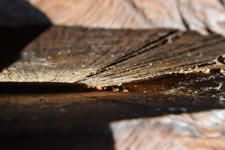
Upon drilling the holes, the tailings were found to be quite wet, which was to be expected. There are several ways to dry out wet wood. Drilling holes, and letting things air dry, pouring isopropyl alcohol or acetone into the holes, or putting the material under a vacuum. This last method is the most effective, but the most expensive and troublesome to execute. Flooding the wood with acetone is the second most effective method, and much easier that pulling a vacuum. So acetone was poured into the drill holes and along the crack down her back. Since the moisture was inside of good wood, several weeks were needed for most of the acetone to gas off, bringing much of the moisture with it.
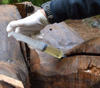
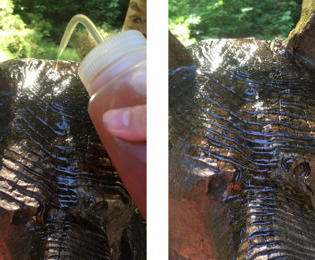
Once the wood was dry enough, it was time to start applying products. First up was the S-1 Sealer. This is a two part epoxy, but blended with solvents to allow it to penetrate any porous material such as deteriorated wood. It was applied until the wood stopped absorbing any more. The S-1 Sealer was applied not only into the holes that were drilled into the body but into the crack that ran down the back. Any excess that came out was captured and reapplied. As with the acetone, enough time needed to pass for the solvents to evaporate. In most cases, one to two days is sufficient. In this case, another two weeks was deemed enough.
S-1 Sealer was used to treat the inside of the hollowed out leg and both the feet. At the same time we also treated the toes that were “removed” for future replacement with the S-1 Sealer.
Once the S-1 was allowed to cure the excess wood from the base was removed in sections over time. The SculpWood Epoxy Paste was used before the General Purpose Epoxy Resin on the inside the bad leg to fill the holes made by the ants. This was done so that the General Purpose Epoxy Resin would not flow back out these holes as we filled the ant cavities from the drill holes we made.
There are several choices when it comes to fillers. Which is best really depends on what and how you are filling. In this case, we needed something that would ooze and settle into a contained area. So there was only one good choice General Purpose (GP) Epoxy Resin. Poured into the drill holes, it flowed and settled into every nook and cranny. It even managed to find the smallest cracks and pinholes through to the outside, which caused leaks. Several times we had to use tape, sometimes with plastic-insulated rags to stop the leak until the epoxy had a chance to cure. While bothersome, it is nice to know that the resin was able to reach the smallest cavities.
While GP Epoxy Resin was used to fill most of the voids, it wasn’t the only product used. Sculpwood Epoxy Paste, either straight, or mixed with sawdust, was used when a thicker product was needed. For fill that was going to be seen on the surface, brown resin dye was added to the mix.
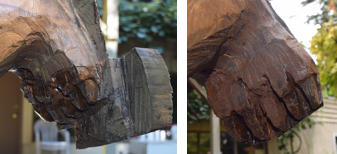
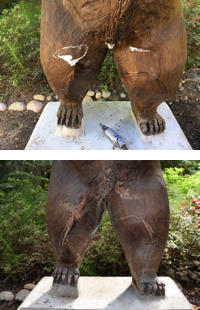
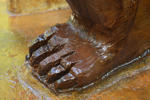
The foot and it’s missing toes were treated with the S-1 Sealer earlier. Once cured, the toes were glued back into place with colored SculpWood Epoxy Paste. The colored SculpWood Epoxy Paste was also used as the finishing fill where there was some missing wood. The SculpWood Epoxy Paste was used to fill most of the open cavity in the leg as well, this was done in stages. Duct tape was used as a backing to fill against in the gap in the ant damaged leg. Filling of the bottoms of the feet and the leg continued to be done with the Paste and in places where the tape alone could not hold the shape, rags were used to give the desired shape.
The GP Epoxy Resin was used to fill in from the top of the leg cavity, (this was done from the extra chainsaw mark left open) again done in stages so that it would be allowed to “percolate” into all the unfilled nooks and crannies.
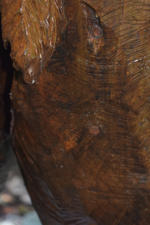
Once the internal cavities were filled, we needed to finish off the drill holes. To get the best look, scrap pieces of wood from the stump were carved into plugs, with the grain oriented in the same direction as the bear. These were glued in, and sawed flush, giving the surface the ability to accept the stain preservative that had been used previously. This made the drill holes nearly invisible.
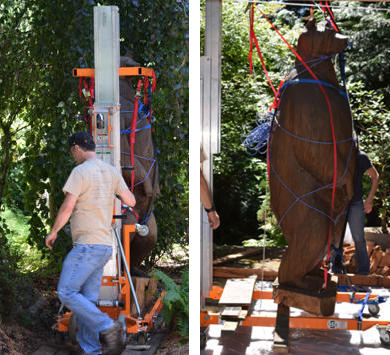
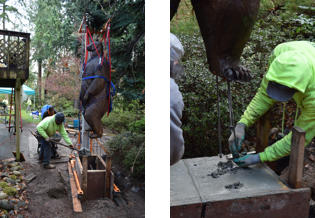
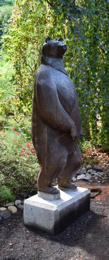
After careful consideration, the decision was made to put the bear back on a concrete pedestal. And to use several pieces of stainless threaded rod in each leg to mount her into the concrete. Suspended over the form during the concrete pour seemed the easiest way to get her aligned properly while the concrete set. Three foot long, 5/8ths inch stainless rod was used, glued in place after holes were drilled into the repaired legs. 3/4 inch washers were added to provide maximum anchoring to the concrete.
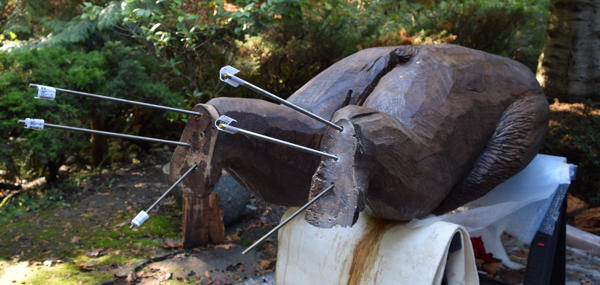
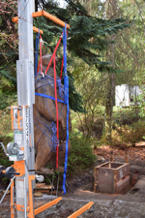
A few days before the concrete was to be poured, the lift was rented, a harness was rigged, and straps were used to lift the the bear upright. After careful tweaking of the position, she was left hanging until pour day. There were a couple of last minute things that needed to be done to the form, so we couldn’t put the bear over the form ahead of time. We had to wait until the actual day of the pour to get the bear moved over the form. The concrete people wanted to pour the concrete first, then sink the rods down in. On our first attempt, we were not able to get the rods to sink all the way down. So she was lifted up, and the washers were removed. Apparently they were catching on the steel reinforcing, or just providing enough resistance to the concrete itself. Fortunately, the rods, with no washers, were able to sink down into the concrete. Just. She got light on the lift as her feet approached to top of the form. After putting her weight back onto the straps, and checking the alignment, she was left in place while the concrete cured.
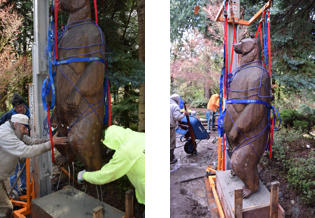
Fortunately, everything went as intended. The whole project ended up being a great success. All that remained was cosmetic work, cleaning up the excess epoxy that is on the surface as well as some of the padding that was glued to the surface. Since moisture can’t wick up through the base any more, the original problem was eliminated.
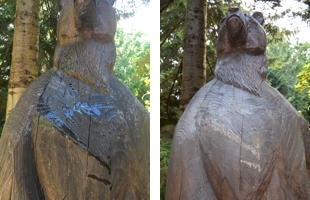
While the main damage was from carpenter ants through the feet, there was some moisture at the top of the head as well. Any cracks in the top of the head were well treated with S-1 Sealer to reduce or eliminate the ability of moisture to get into the wood. That, and a regular application of the original treatment should keep the bear rot free, and looking good for many years to come.
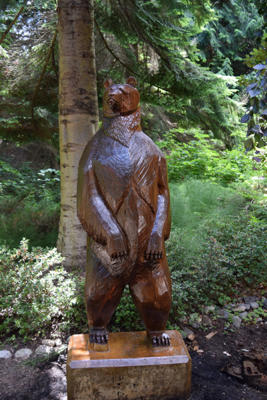
A fresh coat of finish and she’s ready for whatever comes next!
We have included some close-ups of the repairs, the drill holes are barely visible. And you can not tell that the toes were once no longer part of her foot.
Have questions?
Contact us by phone 206-364-2155 or e-mail (send us your pictures) at drrot@rotdoctor.com and we will gladly answer questions about our products or how to apply them. With 20+ years of experience and many more in the boating and construction industries, not much surprises us. We are here to help our customers solve their issues. Let us help you to not have any surprises in your repair project.