
Home > Using our Epoxies- Wood Restoration and Repair Products
Wood Restoration and Repair Products
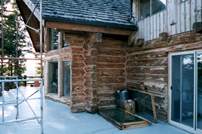
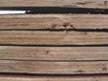
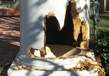
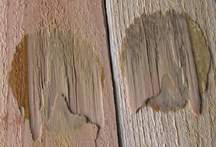
Above: Log Home Repair with CPES with close-up of drilled and plugged logs after CPES application.
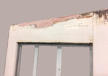
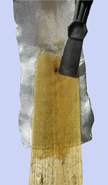
 Window Sill Repair
with CPES & Fill-It
Window Sill Repair
with CPES & Fill-It
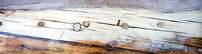
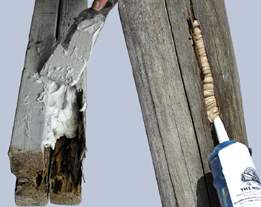
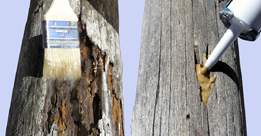
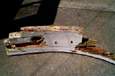
 Horn Timber Repair
using CPES and L & L mixed with sawdust
Horn Timber Repair
using CPES and L & L mixed with sawdust

The restoration of deteriorated wood runs the gamut from the simple application of a penetrating epoxy to harden a soft wood surface, such as a deteriorated window sill, planking on a boat hull, a soft log surface in a log home, to the more complex restoration of house sill plates, rotten logs in log homes and the restoration of house and boat structures. Whatever the situation, as we noted above, a penetrating epoxy is always applied first. It stops the rotting process, hardens soft wood, and forms the chemical base coating for additional epoxy restoration products, should they be required.
The basic procedure is to remove any loose rotted wood, if there is any, make sure the wood is reasonably dry (slightly moist is acceptable), and then apply the penetrating epoxy by brush, roller or coarse spray, whichever is easiest. The wood should be allowed to accept all the penetrating epoxy it will absorb. Multiple coatings of the penetrating epoxy can be applied several days apart if additional hardness is required. Holes, gaps or seams can then be filled later with either our epoxy filler, putty or pastes or a custom filler mix made by mixing sawdust or talc to our epoxy resin. Both of these will cure hard in 24–48 hours and produce a repair that is usually stronger than the wood was originally.
Which exact method of epoxy repair you use will depend entirely on the depth and degree of the rot, and the configuration of the structure being repaired. The pictures to the left show a variety of rot situations and repairs. We will provide specific, detailed and step-by-step advice on wood repairs and restoration if you provide us with a detailed description and/or pictures sent to us jpeg images via email. We answer all email within 24 hours. And we always have a technician available by phone seven days a week Monday to Friday between 6:30 AM and 5:30 PM Pacific time, weekends and holidays 8:30 AM to 5:30 PM Pacific time.
Primary Products for Wood Restoration
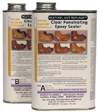
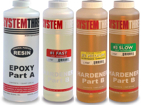
CPES™: Clear Penetrating Epoxy Sealer
& S-1 Clear Penetrating Epoxy Sealer

Both the CPES™ & S-1 are very thin almost-clear liquids that will penetrate dry (or reasonably dry) wood. They contain, in addition to the epoxy resin, a specific blend of solvents which allow the resin to penetrate deep into the wood.
Penetrating epoxy is absorbed through capillary action along the abnormal porosity which dry rot fungus creates within the wood, until all the affected areas are totally impregnated with the epoxy resin. Penetrating epoxy converts the cellulose in the wood to an epoxy-cellulose composite which returns strength and hardness to the wood, and strongly resists further attack by rot fungi or bacteria. We have never seen rot return to wood that has been treated with penetrating epoxy. The penetrating ability of CPES is shown in our Product Testing Section.
Penetrating epoxy is also used as a coating on wood to prevent deterioration, checking and delamination. Penetrating epoxy is especially effective on plywood. The use of penetrating epoxy as a primer coat will also greatly increase the bonding of paint or varnishes to wood or concrete surfaces.
Both penetrating epoxies are a simple 1:1 mix and are easy to apply. Both can be applied by brush, roller, a coarse spray or injected into drilled holes or cracks in the wood.
For additional information on CPES, click here.
For
additional information on S-1 Clear Penetrating Epoxy Sealer, click here.
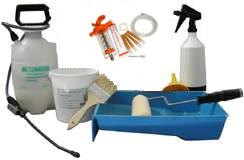
Application choices for applying either penetrating epoxy.
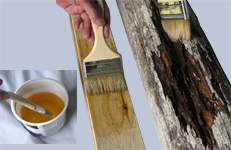
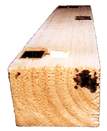
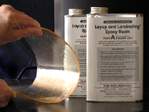
CPES mixed in equal parts and applied to board and badly rotted log.
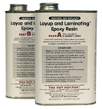
Fill-It™ Epoxy Filler,
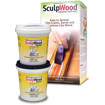
Sculpwood Moldable Epoxy Putty
& Sculpwood Epoxy Paste
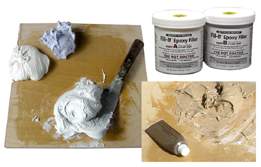
Above left: Fill-It parts A & B unmixed and mixed, in equal parts. Above right: Epoxy Coloring agent added to the mixed Fill-It. Below: Fill-It applied with putty knife to a badly damaged 4 x 4. Below right: tinted Fill-It applied to deep crack in log with one of our re-usable caulking tubes (10 oz size).
Fill-It™ Epoxy Filler, Sculpwood Moldable Epoxy Putty and the Scuplwood Epoxy Paste are all sag resistant two-part epoxy fillers that are commonly used after the application of penetrating epoxy to fill holes, cracks, seams and other voids. They all cure overnight, and are easily sanded once cured. They cure to a beige color but can be tinted to any tone of tan or brown with our Epoxy Coloring Agent. Our epoxy fillers can be painted over directly. And can be drilled to accept screws or nails and will not break or crack.
To ensure good adhesion of the epoxy fillers to a surface, the first application should be worked well into the surface. An additional quantity can then be applied to build up the required thickness before curing. On large areas the applications can be made sequentially, allowing the first application to cure and then adding additional epoxy filler to the surface. These materials may be tooled smooth by placing a new piece of polyethylene (such as kitchen-wrap) over the uncured material and using a blade, squeegee or other tool to smooth the filler through the film. When cured, the film can be easily peeled off. To ensure the adhesion of a primer or paint (if desired), we recommend that the epoxy fillers be lightly sanded.
For additional information on Fill-It Epoxy Filler, click here.
For additional information on Sculpwood Moldable Epoxy Putty, click here.
For additional information on Sculpwood Epoxy Paste, click here.
Below are some examples of repairs made with CPES and Fill-It Epoxy Filler or S-1 and Sculpwood Epoxy Paste. Click the photo to see a larger version, or click the caption to go to the article in our website to see the final result.

Layup & Laminating™ Resin
& General Purpose Epoxy Resin
 Demonstration of the flexibility of cured Layup & Laminating Epoxy Resin.
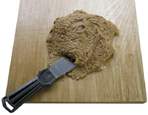
Layup & Laminating Epoxy Resin mixed with sawdust into a dense putty which is applied with a putty knife.
Above left: L & L Resin applied (after CPES application)
to consolidate wood in a rotten log. Above right: a slurry mix of L & L Resin
and sawdust is pumped into a deep crevice in a log with our re-usable poly caulking
tube (10 oz size).
L & L Resin is used to apply fiberglass cloth to a flat
wood surface.
Layup & Laminating™ Resin & General Purpose Epoxy Resins are both honey-like epoxy resins. They are pure resin, without additives, and they retain a slight degree of flexibility when cured, similar to that of wood. To the right is a picture of a 1/16″ thick sheet of fully cured Layup & Laminating Resin being bent without breaking. Other epoxies will shatter under similar stresses. Both Epoxy Resins cure without “blushing” or emitting any other type of oily residue.
Both Epoxy Resins can be used in wood restoration and repair in two ways: 1) As a pourable/brushable thick laminate to reinforce deteriorated wood previously treated with penetrating epoxy, and 2) as the mixing base for the addition of wood flour or sawdust or talc to make an epoxy filler of any desired density. This mix, depending on density, can be poured into place, pumped in place through a caulking tube, or when sufficiently thick, bladed in place with a putty knife.
Applied to the surface of moderately rotted wood that has been treated with penetrating epoxy, the epoxy resins will settle into the grooves and cracks and form a smoother base for the application of the epoxy fillers or a denser mixture of the epoxy resin and sawdust. Structural strength is increased significantly.
Where the interior of the deteriorated wood is convoluted and difficult to fill with a paste filler (such as with termite damage or deteriorated fiberglass deck cores), epoxy resin can be poured or caulk-gun-pumped into cavities. If necessary, the wood can be tightly wrapped with polyethylene (kitchen wrap) plastic to hold the resin in place, and then the film is removed when the resin has cured. To increase density, wood flour or sawdust can be added to make a thicker fill, which can vary from pourable (for settling into place), pumpable with a caulking gun, to a thick, packable mix. It cures very hard in about 24 hours. It is difficult to sand once cured so the finished surface should be as formed and smooth as possible.
Epoxy resins are an excellent bonding agent for soft woods, such as plywood, pine, fir. The resin penetrates the wood surface and produces an exceptionally strong bond. The epoxy resins are spread to about 1/16″ on both surfaces and the surfaces pressed together firmly (but not tightly) for 24 hours.
Epoxy resins are also commonly used for fiberglass layup. They are simple to mix. The resin is applied to the surface and the cloth is pressed into the resin. The glass cloth will go completely transparent in a few minutes as the resin does its job. Our epoxy resins do not “blush”, and sanding or wipe-down is not required between resin applications, as long as recoat is less than 48 hours.
Layup & Laminating Resin is mixed 1:1 by volume, and is forgiving of minor mix errors. Mixing by weight may be done at 10 parts “A” to 12 parts “B” by weight. For best results mix in one container, transfer to a second container and mix again. Allow to sit for 10 minutes before use. Full cure will be obtained down to 28°F. For additional information on Layup & Laminating Resin, click here.
General Purpose Epoxy Resin is mixed 2:1 by volume, with a choice of 3 hardeners to allow a cure down to 35°F, or up to summer temperatures, with no limitations on humidity. For additional information on General Purpose Epoxy Resin, click here.
Below are some examples of repairs made with CPES and Layup & Laminating Epoxy Resin. Click the photo to see a larger version, or click the caption to go to the article in our website to see the final result.


Secondary Product for Bonding and Lamination
All Wood Epoxy Glue
Above: Two boards bonded with All Wood Epoxy Glue are force-separated. The wood splits away before the glue-line separates.
All Wood Epoxy Glue is a moderately thick and highly flexible epoxy adhesive which will bond oily hardwoods such as teak and apetong, as well as the softer woods such as spruce and fir. A freshly sanded or saw-cut surface is adequate surface preparation. It will also bond a wide variety of metals, glass, rubber or plastic materials. The cured adhesive is completely waterproof and weatherproof.
The formulation and ingredients are derived in large part from the natural resins of wood itself, which accounts for its toughness, flexibility and natural compatibility with all species of wood.
All Wood Epoxy Glue is mixed 1:1 by volume and is forgiving of minor mix ratio errors. Mixing by weight may be done at 10 parts “A” to 12 parts “B” by weight. For best results mix in one container, transfer to a second container and mix again.

The picture to the right shows a curved stern rub rail on a boat which was constructed by bonding together ¼″ fir planks with the Tropical Hardwood Epoxy Adhesive. Impact resistance and cured-flexibility were the reasons the Tropical Hardwood Epoxy Adhesive was used for this application.
For additional information of All Wood Epoxy Glue, click here.